Blu-ray guide

Rip Blu‑ray with selectable or burned subtitles

Choose Blu-ray subtitle languages and forced tracks, preserve them in Multi-track MKV, and verify timing and playback before processing a collection.

Updated September 11, 2026By

The free version limits many processing operations to the first three minutes. Check compatibility and trial limits.

  • Blu-ray sourceDisc, folder, or ISO
  • Choose Multi-track MKVOutput matched to this workflow
  • A multitrack MKV file checkVerify before batch processing

Problem and solution

Confirm the disc source and playback goal.

Select the correct title, audio, and subtitle tracks, then match the output to the player, device, or archive workflow.

Select the required Blu-ray subtitles

Process only a disc you are authorized to copy. Blu-ray titles can include full-language captions, forced dialogue, signs-only tracks, commentary, and hearing-impaired subtitles. Many discs store subtitles as bitmap-based PGS streams, so support varies by output container and player. Preview or identify the language and role before conversion rather than selecting a track by position alone.

Choose selectable or burned subtitles

Keep a selectable subtitle when the output container and player support the source type and you may need to change language or turn captions off later. Burn subtitles into the picture only when they must always be visible, because burned text cannot be disabled or corrected without creating another video. Forced-dialogue tracks need special care: verify that the intended player recognizes the forced flag or select the required stream explicitly.

Preserve the selected tracks in MKV

Use a multi-track MKV workflow when you need the selected video, audio, chapter, and subtitle streams together. Select the correct title and keep the required audio language, subtitle language, and forced or hearing-impaired track. The MKV container can carry multiple tracks, but the destination still determines which codecs and subtitle types it can display.

Verify subtitle timing and language

Open one output in the intended player and test the beginning, a dialogue-heavy scene, a forced-signs scene, and the end. Check language labels, forced behavior, timing, line breaks, picture, audio channel mapping, seeking, and sync. Keep the original disc until every required track has passed this test.
Solution direction

Apply the solution in the workflow below.

Choose Blu-ray subtitle languages and forced tracks, preserve them in Multi-track MKV, and verify timing and playback before processing a collection.

Three-step workflow

Create and verify one test output before processing the full batch.

Choose Blu-ray subtitle languages and forced tracks, preserve them in Multi-track MKV, and verify timing and playback before processing a collection.

01

Add the source

Load the Blu-ray disc

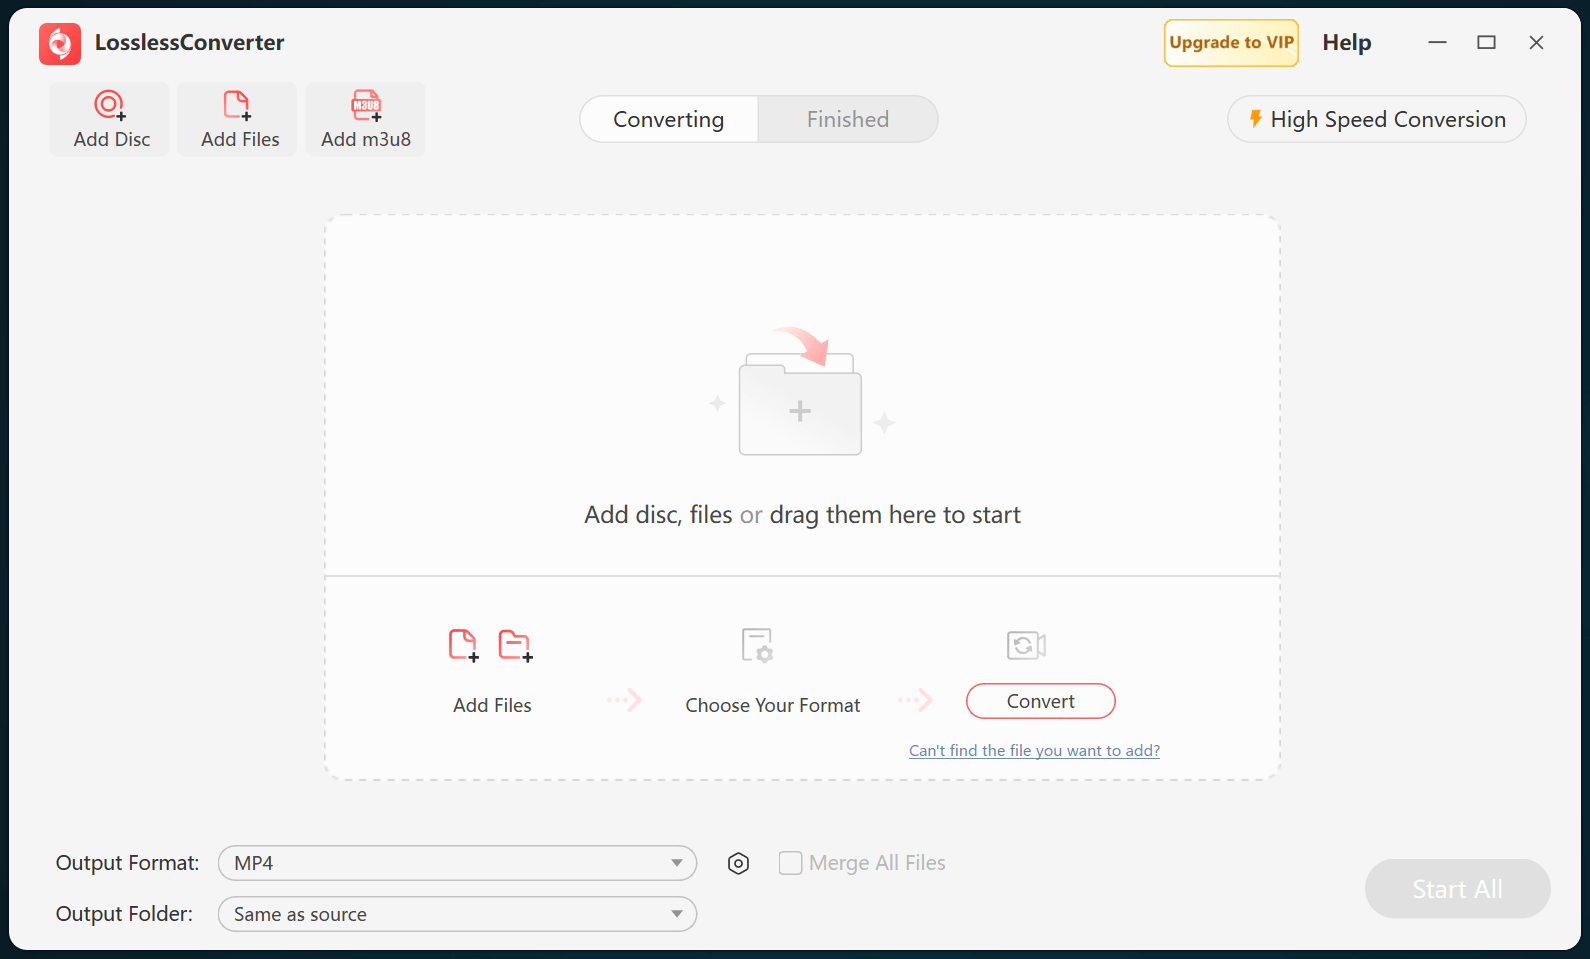
Open LosslessConverter and select Add Disc. Add the Blu-ray disc, then select the required title, audio, and subtitle tracks.

LosslessConverter main window with the source controls visible
Source toolbarLoad the source from the main toolbar.
02

Preserve selected tracks

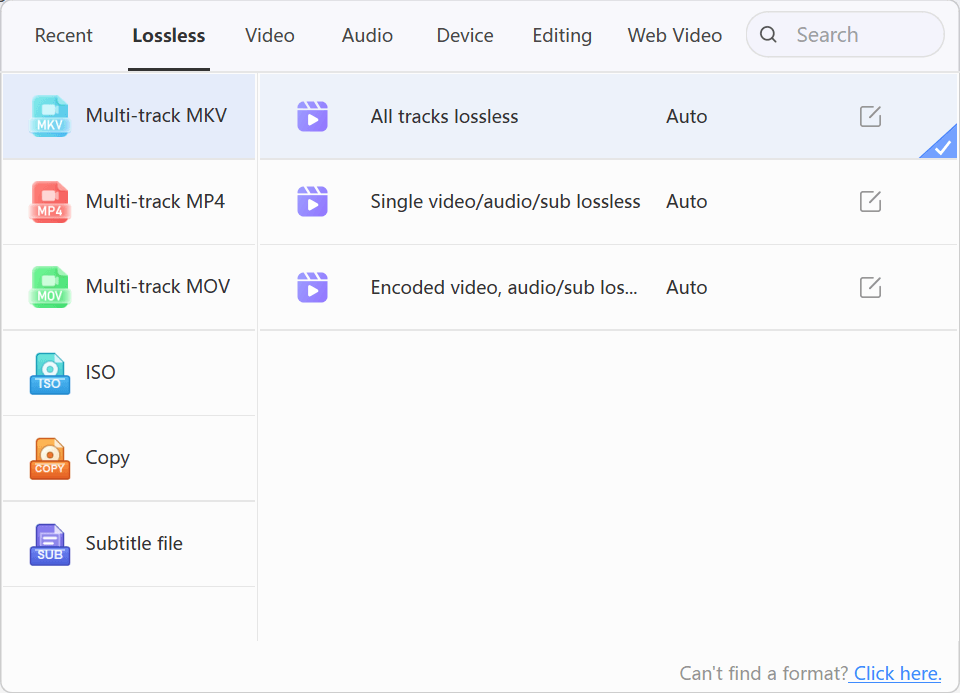
Choose Lossless > Multi-track MKV

Open Output Format, select the Lossless group, and choose Multi-track MKV. Keep the audio and subtitle tracks required by the destination.

LosslessConverter Output Format menu with Lossless and Multi-track MKV selected
Multi-track MKVSelect Lossless, then choose Multi-track MKV.
03

Create the current output

Select Start All, then verify in a multitrack MKV file

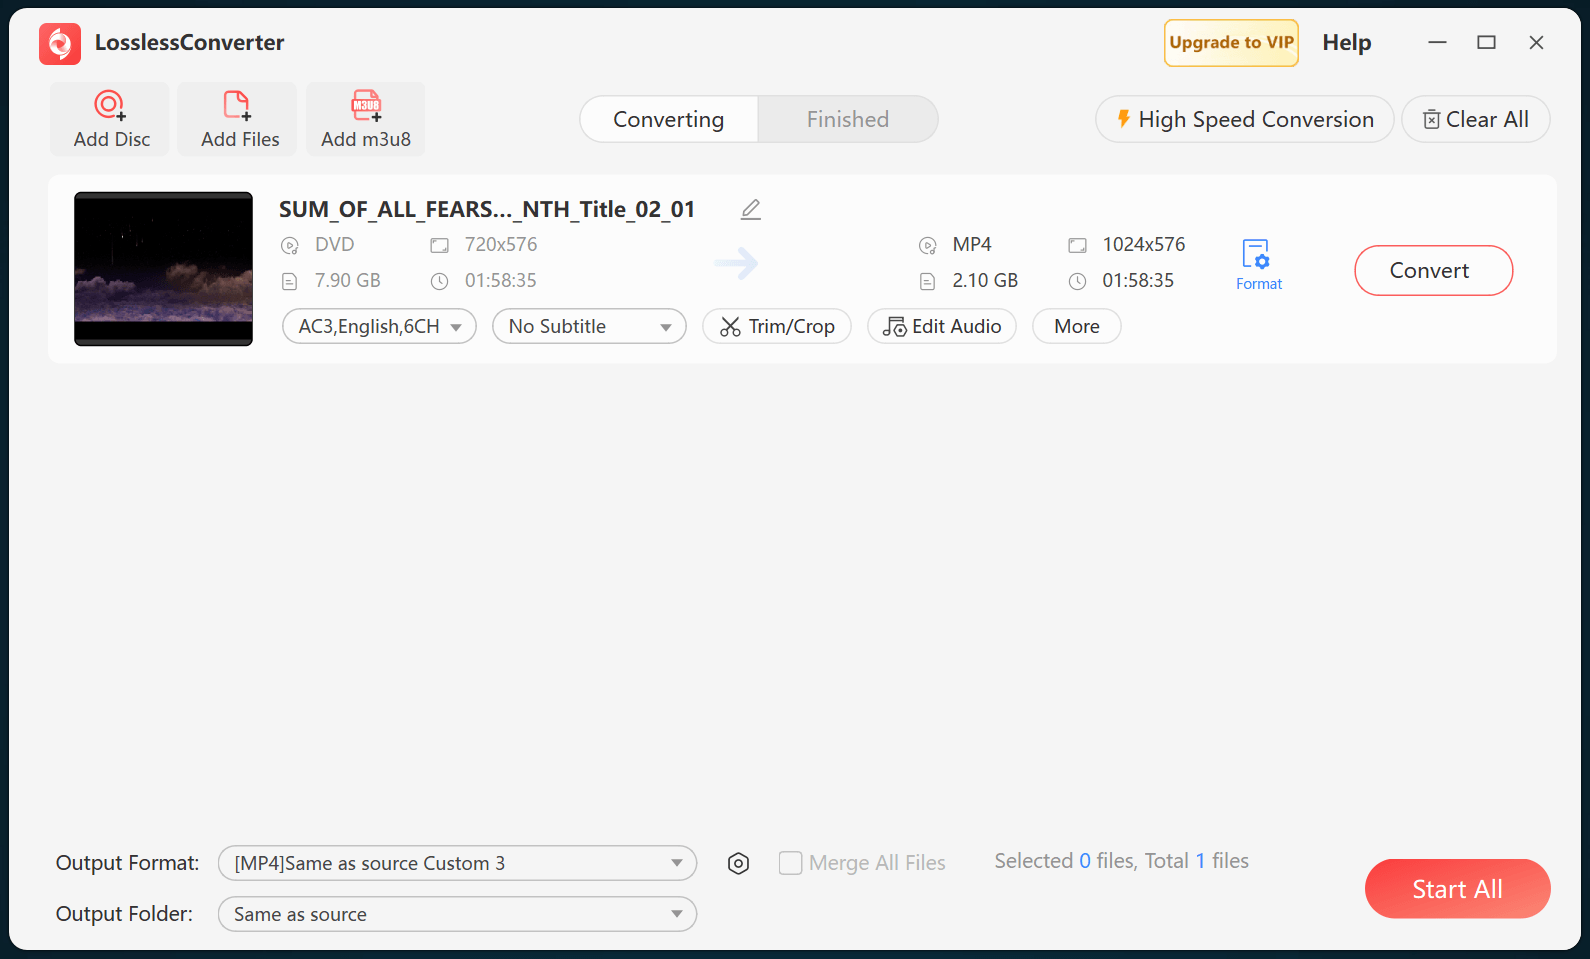
Choose an output folder and select Start All. When processing finishes, open the MKV in the destination player and verify the selected subtitle and audio tracks.

LosslessConverter main window with Start All ready at the lower right
Start AllRun the task, then verify the result.

Try it with your own media

Process one file, verify the result, then run the full batch.

The free version limits many processing operations to the first three minutes. Check compatibility and trial limits.