Quick editing
Make practical changes without another app
LosslessConverter includes tools for adding or removing a watermark, splitting a video into segments, changing playback speed, merging clips, trimming, cropping, rotating, flipping, adding subtitles, and preparing the final output format.
The Watermark Editor supports batch jobs, so the same approved mark can be positioned once and applied across multiple videos.
Watermark Editor
Add a watermark
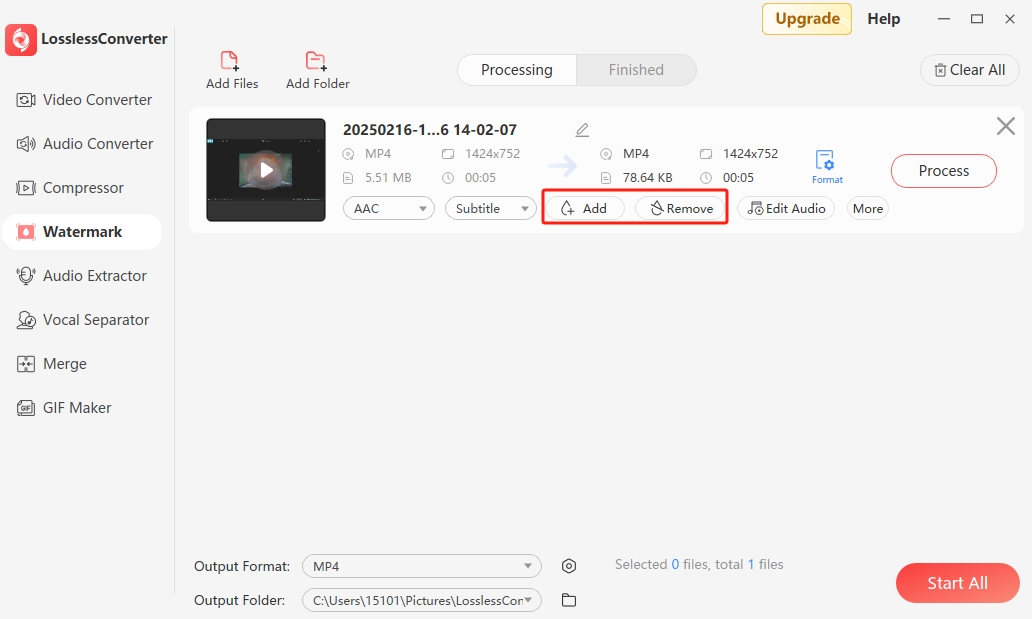
- Open LosslessConverter and choose Watermark Editor.
- Drag a video into the start area, or use Add Files or Add Folder.
- Choose the Add mode.
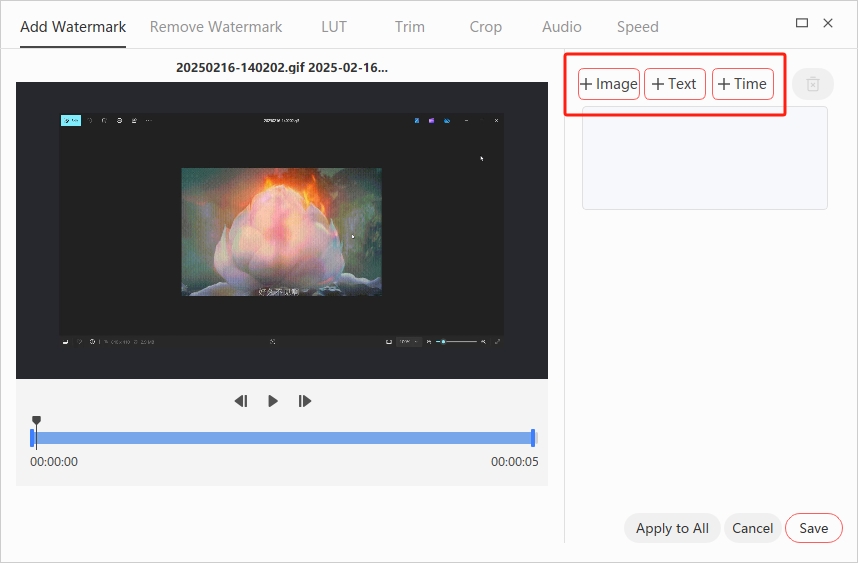
- Choose one of the three watermark types: Image, Text, or Time.
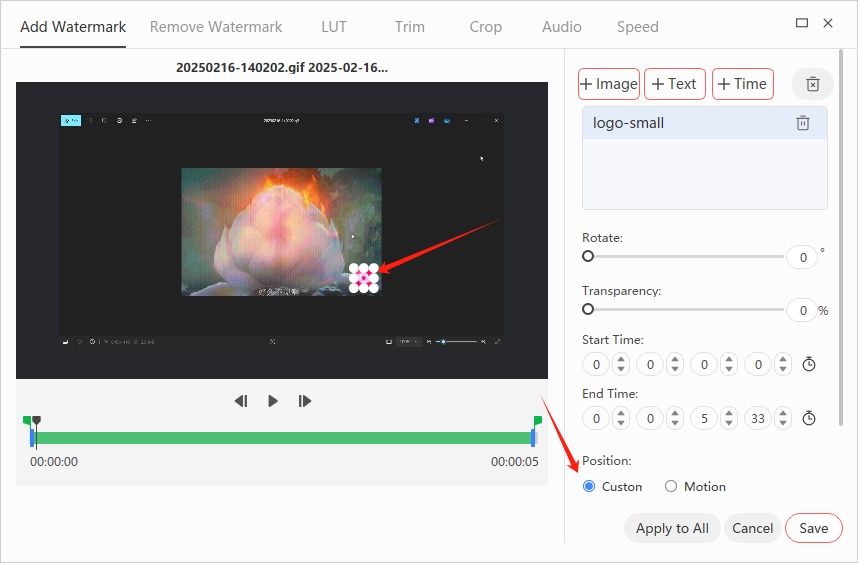
- Customize the content, size, appearance, and timing as needed.
- Drag the watermark in the preview to the intended position.
- Select Save. For multiple videos, use Apply to All, return to the main task list, and choose Start All.
Cleanup
Remove a watermark area
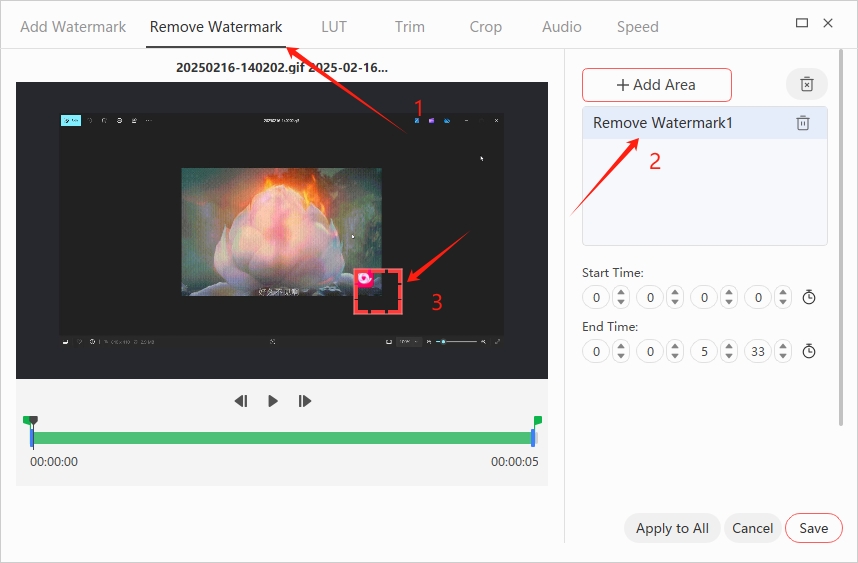
- Open Watermark Editor, import the source, and choose Remove Watermark.
- Create a selection area over the unwanted mark.
- Resize and position the selection so it covers the watermark for the full period in which it appears.
- Preview the result, save the edit, and start the task.
Watermark removal reconstructs the selected area from surrounding pixels. Results vary with movement, texture, and how much of the frame is covered.
Better results
Quick editing tips
- Preview the first few seconds and a frame near the end to confirm the watermark stays within the frame.
- For consistent batches, use files with the same resolution and composition before selecting Apply to All.
- Trim unnecessary footage before compression so the encoder does not spend time processing material you will remove.
- Choose the final output format after editing to avoid an extra generation of transcoding.