Before you begin
Choose the right compression method
LosslessConverter can optimize a file automatically or let you combine several controls. Start with the intended use:
- Exact attachment or upload limit: specify the target size.
- Large ProRes or CineForm source: set a target size and transcode to an efficient codec.
- 8K, 4K, or 1080p for social media: combine target size, an efficient codec, lower resolution, and adjusted audio.
- High-bitrate camera footage: tune target size, bitrate, and resolution.
- Screen recordings for chat or email: set a target size, transcode, and reduce audio overhead.
- High-frame-rate footage for editing: combine target size, codec, and frame-rate controls.
Method 1
Specify the target size
This is the fastest way to meet a known file-size limit.
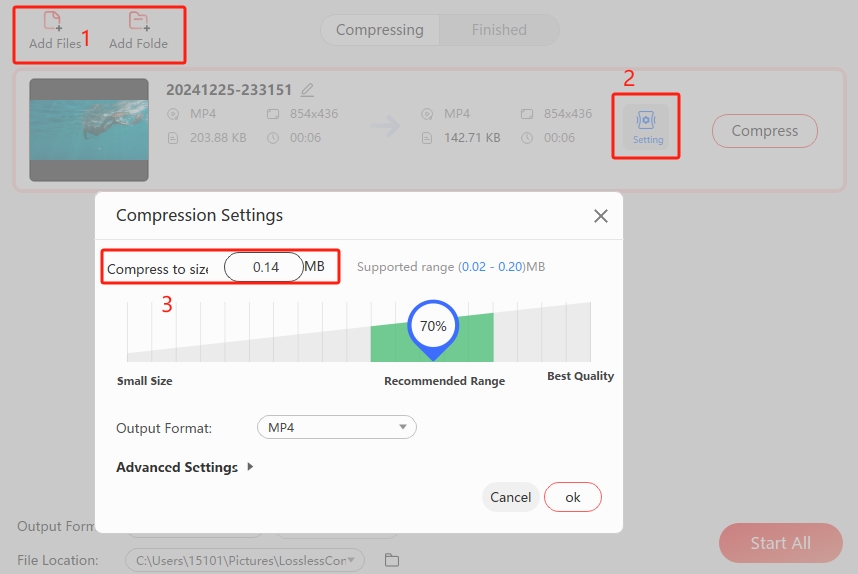
- Open LosslessConverter and choose Compressor.
- Add one or more files with drag and drop, Add Files, or Add Folder.
- Open Settings, enter the target file size directly, or move the compression-ratio slider.
- Select Compress or Start All.
Method 2
Transcode to a more efficient codec
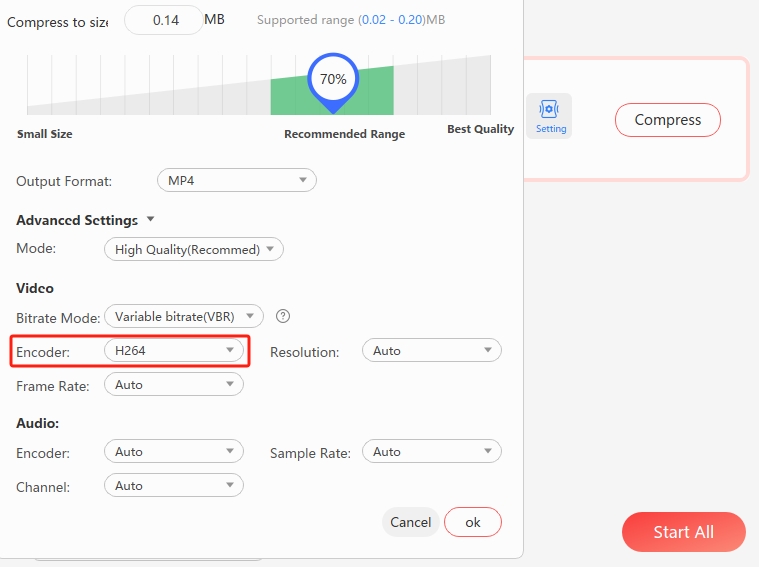
- Open Compressor and add the source media.
- Choose Settings > Advanced Settings.
- Select a more efficient option such as MP4 H.264 or MP4 HEVC.
- Start the compression job.
| Codec | Relative efficiency | Typical use |
|---|---|---|
| H.264 / AVC | Baseline | Broad playback support, streaming, conferencing |
| H.265 / HEVC | Up to about 50% bitrate savings | 4K/8K and compatible TVs/devices |
| VP9 | About 30-50% savings | YouTube and web streaming |
| AV1 | About 50-60% savings | Low-bandwidth delivery and efficient high-quality output |
Method 3
Reduce the frame rate
Frame rate controls how many frames appear each second. Lowering it can substantially reduce static or low-motion content without an obvious quality change, but is less suitable for sports, gameplay, or fast camera movement.
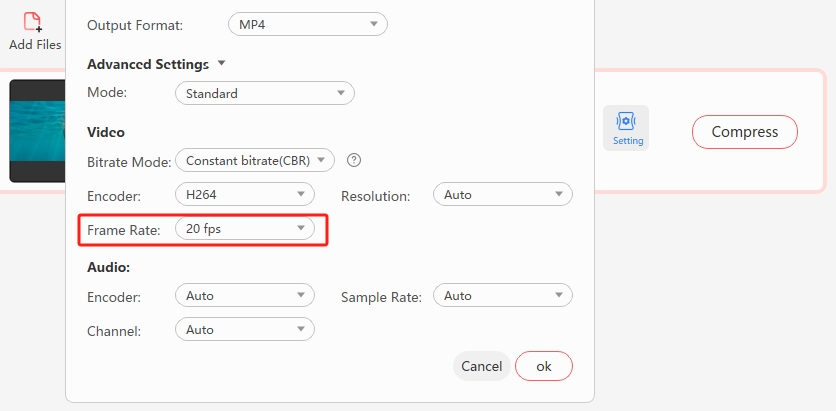
- In Compressor, open Settings > Advanced Settings.
- Find Frame Rate and select a lower target.
- Start the compression job and review a short sample before committing a long batch.
Method 4
Lower the video bitrate
Bitrate is the amount of video data used per second. Lowering it usually reduces output size directly:
| Resolution | Standard frame rate | High frame rate |
|---|---|---|
| 2160p 4K | 35-45 Mbps | 53-68 Mbps |
| 1080p HD | 8 Mbps | 12 Mbps |
| 720p HD | 5 Mbps | 7.5 Mbps |
- Open Settings > Advanced Settings.
- Choose a lower bitrate and select CBR or VBR.
- Start compression and inspect fine detail or motion in the result.
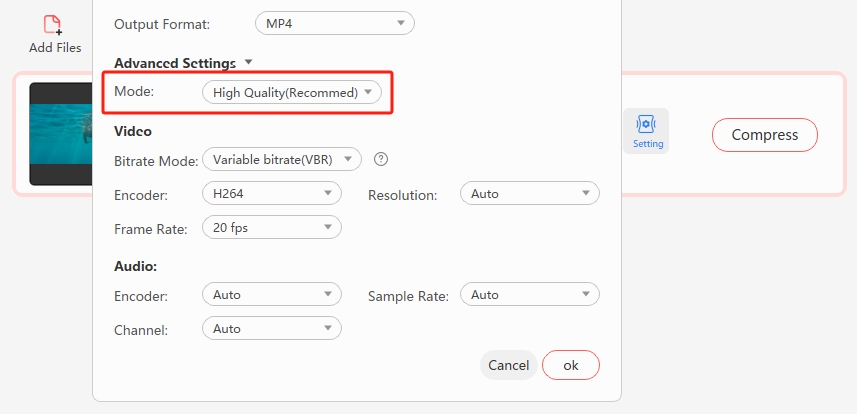
CBR holds the same bitrate throughout the video. VBR allocates more bits to complex scenes and fewer to simple scenes, and is often the better balance of size and quality.
Method 5
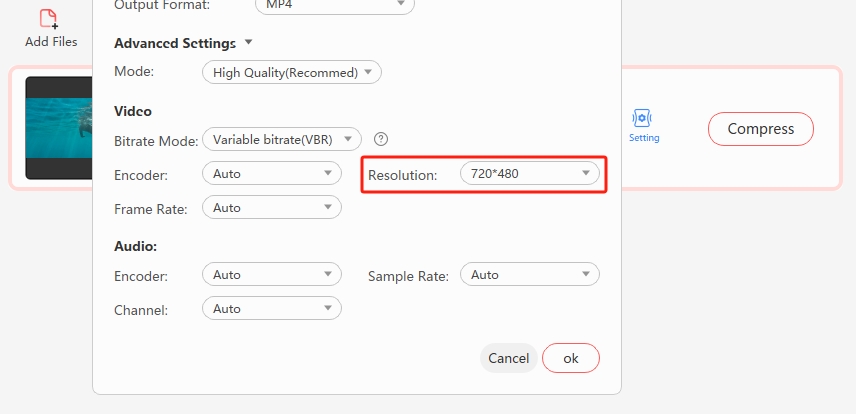
Reduce the resolution
Downscaling is effective when the output will be viewed on a smaller screen. Differences between 4K and 1080p, or 1080p and 720p, may be much less visible on a phone than on a large monitor.
- Open Settings > Advanced Settings.
- Open Resolution and choose 4K, 1080p, 720p, 480p, or another lower value.
- Start compression.
Method 6
Adjust the audio
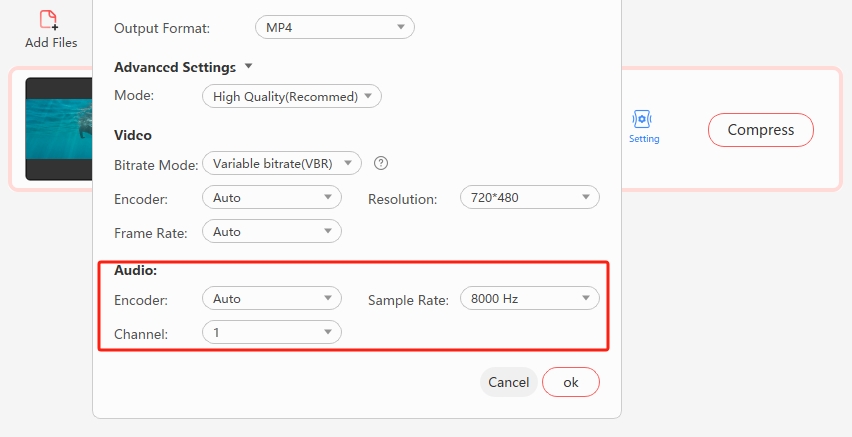
For social clips, meeting recordings, and other speech-focused files, lower audio bitrate, sample rate, or channel count can reduce size with little practical impact. You can also remove audio from a video that does not need sound.
- Open Settings > Advanced Settings.
- In the Audio area, select a lower sample rate, bitrate, or channel count.
- Start compression.
Fine tuning
Balance output quality and size
Codec, bitrate and its control mode, resolution, frame rate, GOP, profile level, and audio all affect output. If those terms are unfamiliar, begin with a LosslessConverter preset or target size instead of changing every parameter.
Other editing operations can also reduce size as a useful side effect: crop an unwanted area, trim unnecessary time, or split a long video into smaller segments.